
Controlling Reaper with OSC
Reaper allows remote control of mixer parameters (gain, sends, ...) and all VST parameters. This feature can be used in live scenarios or as a versatile way of creating control trajectories in fixed media compositions - because drawing all parameter automations in the envelope trajectories is not feasible when it comes to complex projects.
While the OSC workflow in Reaper is pretty straightforward, the official documentation (https://www.reaper.fm/sdk/osc/osc.php) does not provide clear instructions. This section gives a simple example, including all necessary steps to control parameters from a PD patch.
Basic Settings
First thing is to create a new control surface. This allows Reaper to receive OSC messages in the first place. Open the REAPER preferences and navigate to Control/OSC/web. Click Add create a new OSC input:

Basic settings for enabling OSC control in Reaper.
This opens the Control Surface Settings (see below). Chose OSC in the drop-down for the Control surface mode. In this example we are sending OSC control messages from the computer that is also running Reaper (Mode: Local port). The most important setting is the Local listen port. It needs to match the sender's port - in this example we choose 7777:

Basic settings for enabling OSC control in Reaper.
Channel and Parameter Settings
Once the OSC control surface is activated, individual parameters can be activated for OSC control. This example looks at a project with only one channel and one plugin to keep things simple. Start with a blank project, add one track and add a plugin of your choice to it.
It takes 3 more steps in the channel's parameter envelope settings (red square) to enable the recording of OSC controlled parameters:
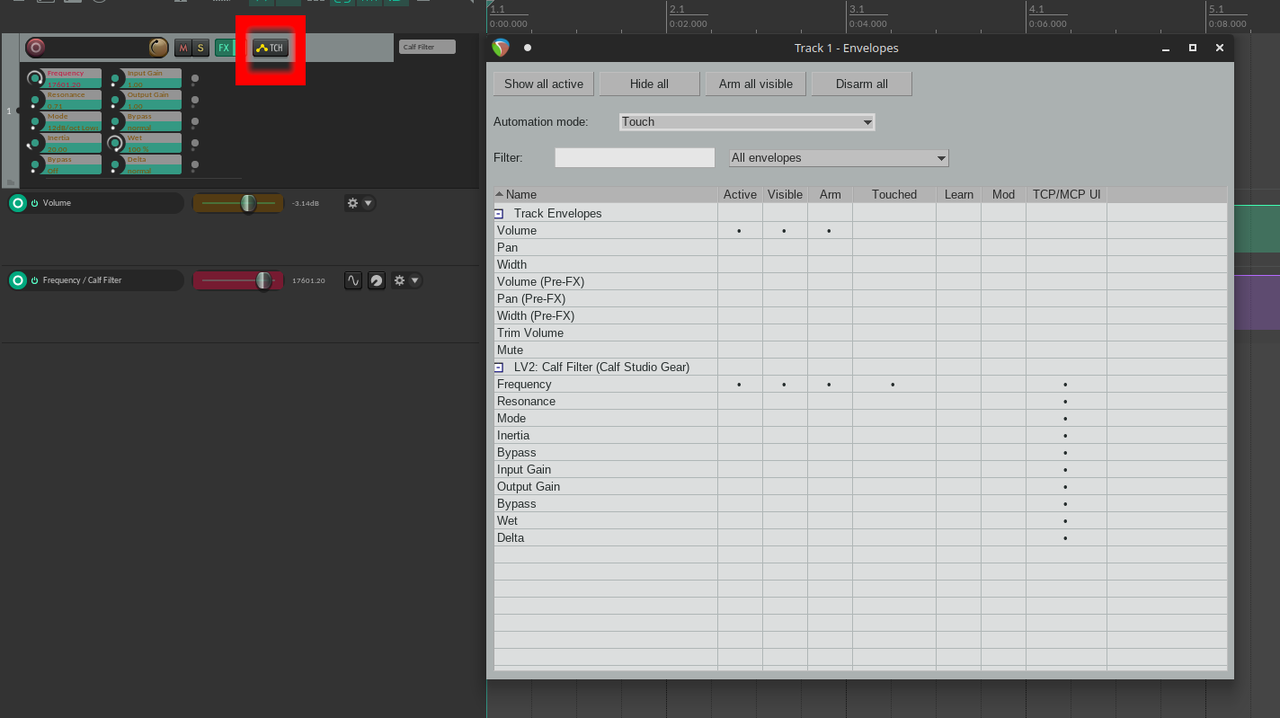
Arming VST parameters for OSC control.
Set the Automation mode to Touch / Latch / Write to allow parameter control in general.
With an OSC surface added in Reaper, the envelope settings show a new column TCP/MCP UI. To receive OSC messages for a parameter, check this box in the parameters row.
Check the boxes Active, Visible, Arm for the parameter you want to control.
Sending OSC Messages
Parameter Values
No matter what the parameter controls - all VST parameters are internally scaled from 0 to 1. When sending OSC control, every parameter is controlled with floats ranging form 0 to 1. This applies to both methods introduced below.
Default OSC Paths
After completing the above steps, the VST plugin is ready for remote OSC control. All plugin parameters can be controlled with default paths. The path for controlling the first parameter of the first plugin of in the first channel:
/track/1/fx/1/fxparam/1/value
Reaper counts everything starting with 1. No matter how a channel is named, it always shows the channel number in the mixer strip and the arranger window. Plugins are counted in the order they are arranged in the FX chain (first plugin is 1). Parameter counting is the trickiest part. One way to figure it out is trial and error. To see the counting order of the plugin parameters, deactivate the plugins user interface by clicking the UI button in the FX window. The plugin will now be shown in the native Reaper look, with all parameters listed from top to bottom.
PD Example Patch:
The following PD patch uses only Vanilla objects to control the first parameter of the first plugin of in the first channel. It will generate a message with the OSC path shown above and add one float parameter:
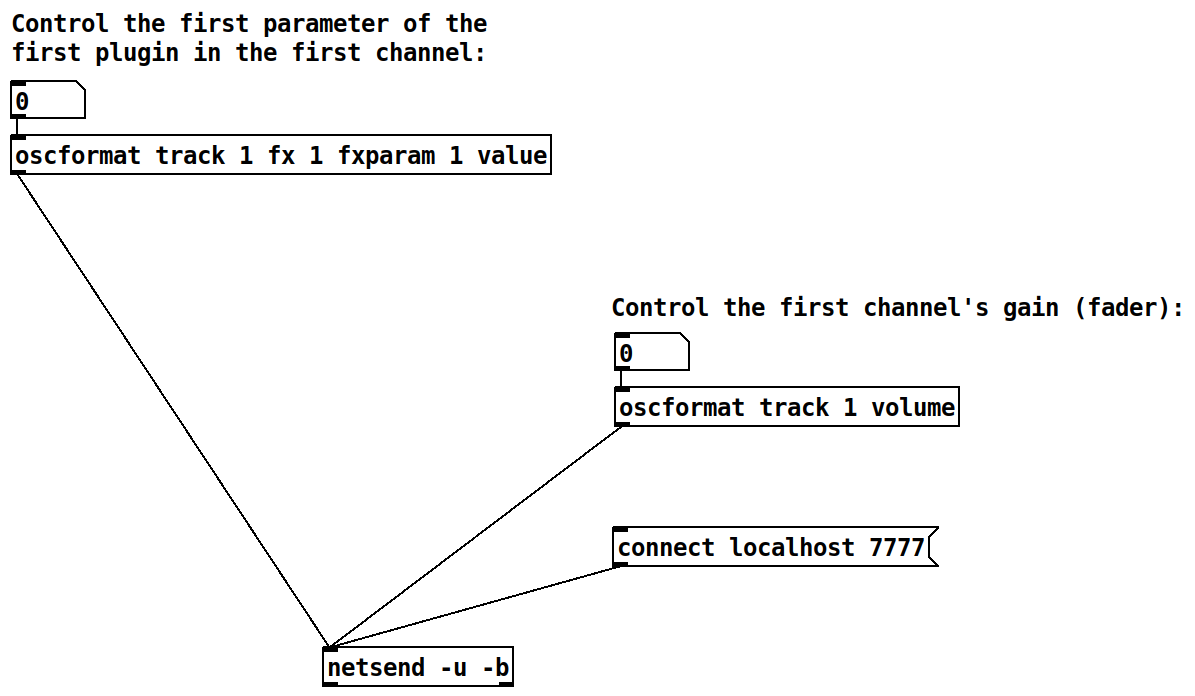
PD patch for controlling channel gain and VST parameters.
The file Default.ReaperOSC - located in your system's install directory - allows customization of OSC listening ports. This can be helpful when the possibilities of configuring an OSC sending device are limited.
OSC Learn
Using the default OSC paths can be tricky, since the channel andplugin numbering will change when the arrangement is changed. It is much easier to use the learn function, which works exactly like MIDI learn. This also allows for arbibtrary OSC paths that can be defined on the sending side. Use the Learn option in the Envelope menu for a track to start OSC learning for a parameter:
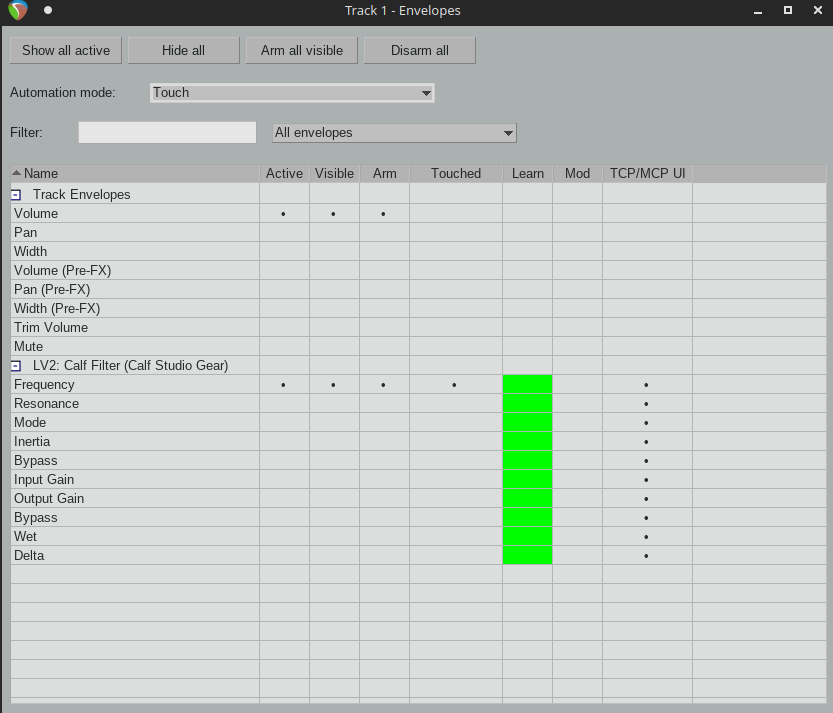
Once activated, the OSC Learn function will grab the next incoming OSC message and assign it. Make sure to only send the relevant parameter when activating Learn to avoid confusion.
Recording Automations
To record incoming OSC automations (or paramter movements from the GUI of a plugin), the Automation Mode of the channel has to be changed in the Envelope settings:
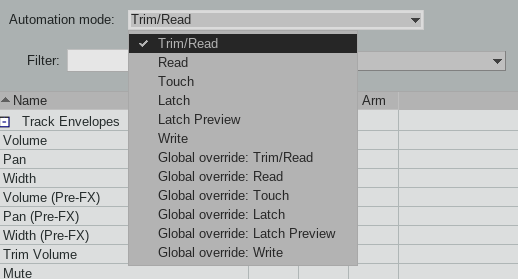
It is on Trim/Read by default. It has to be set to Write, Touch, Latch, or Latch Preview to record paramter movements. Read the Reaper manual for an in depth explanation of the modes: https://www.reaper.fm/userguide/ReaperUserGuide757e.pdf