
Max for Live: A Short Introduction
Max for Live makes max patches run as part of an Ableton Live session. Depending on the nature of the patch, it can be inserted as a device in Audio or MIDI tracks by drag and drop. MIDI and audio outlets of the patch will be visible and usable inside Live like the connection of any other component. Over the years, many devices have been created by the community, some for free, some for sale: https://maxforlive.com/
The concept and its details are best described on Ableton's Live page. This short introduction should only cover the very basics for a quick start.
Max Audio Effects
Dragging the default Max Audio Effect into a track gives a basic patch
connecting audio inlets (plugin~) with audio outlets (plugout~).
Any processing can be inserted in between.
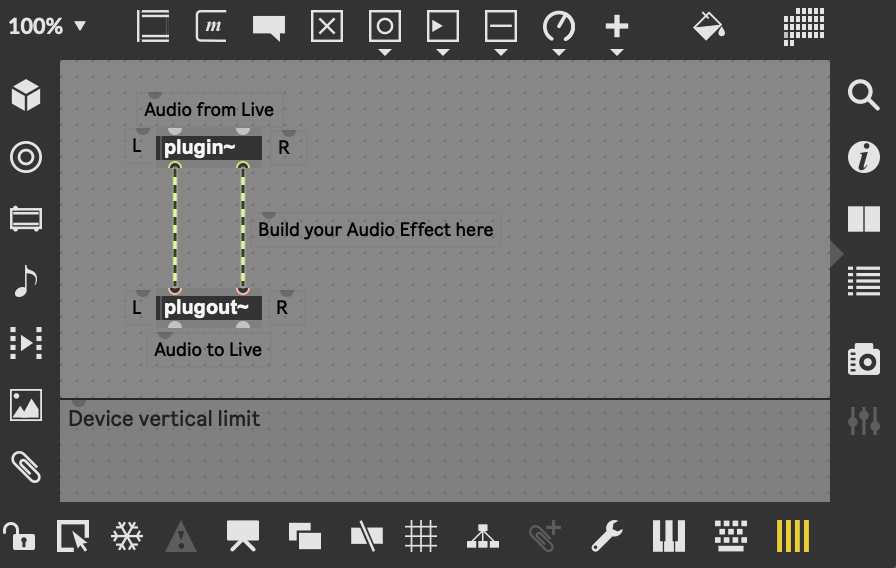
The default Max Audio Effect.
The following example uses the degrade~ object inside a Max Audio Effect.
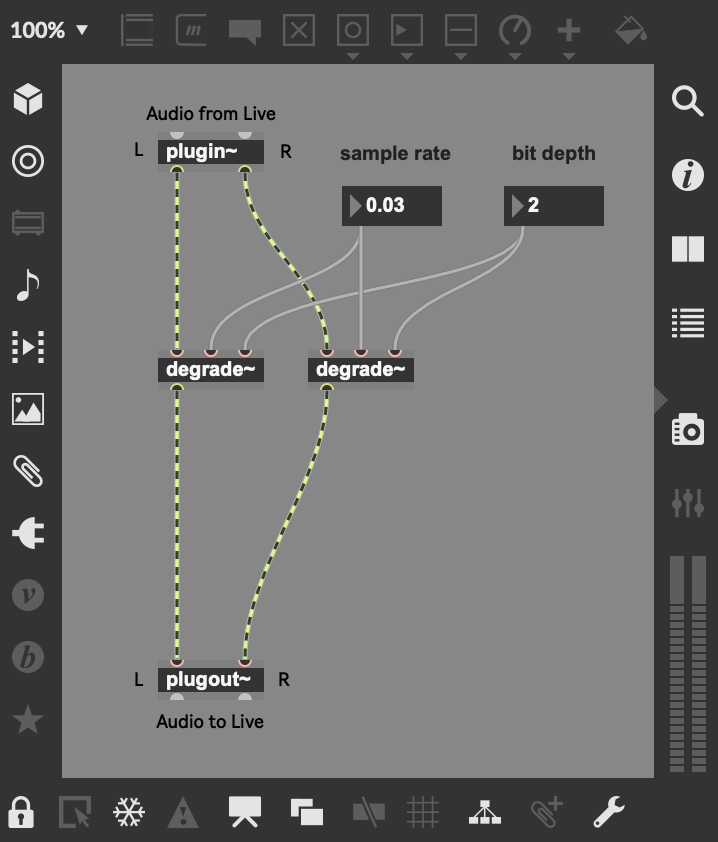
A degrader effect inside Max for Live.
Max Instruments
The default Max Instrument can be dragged into a MIDI channel. It gives
a patch with a midiin object to receive any incoming MIDI data and
the plugout~ object to send audio into Live.
Unlike the default Audio Effect, this patch is not functional.
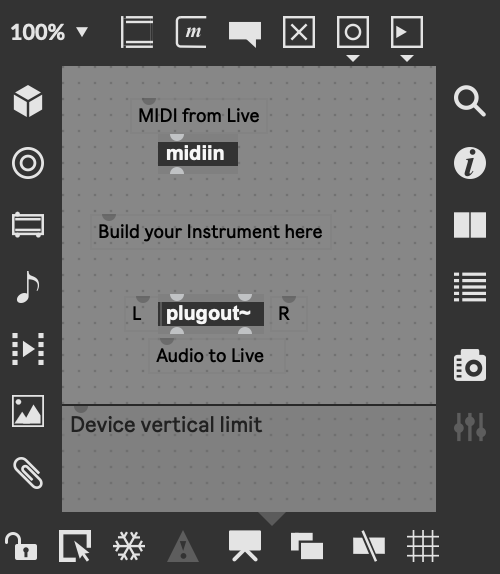
The default Max Instrument.
Like the midiin object, other MIDI objects in Max can also be used inside Max For Live devices.
The following mini saw example shows how to control a patch with MIDI from Live, using the notein
and the ctlin objects.
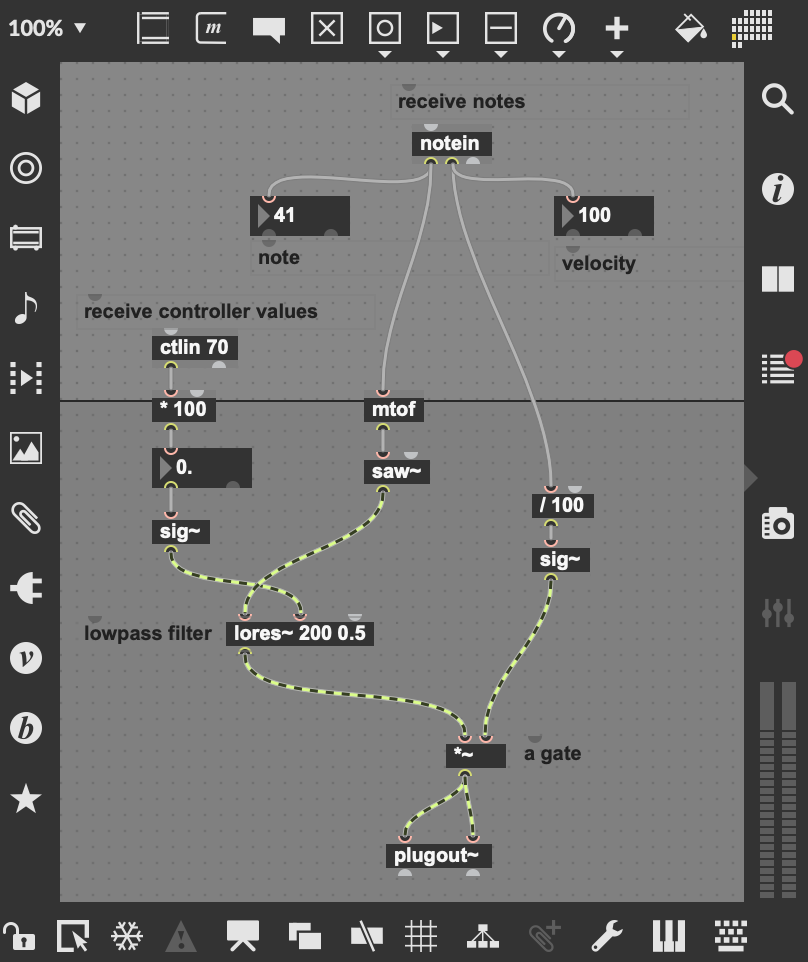
A mini saw synthesizer.
Automation to Max for Live
The Inspector View
Although controlling Max for Live with MIDI is a good solution for many applications, Device Parameter Automation offers more flexibility and can also be used in audio channels. Most parameters in a Max for Live patch can be activated for automation, by editing inside the number inspector:
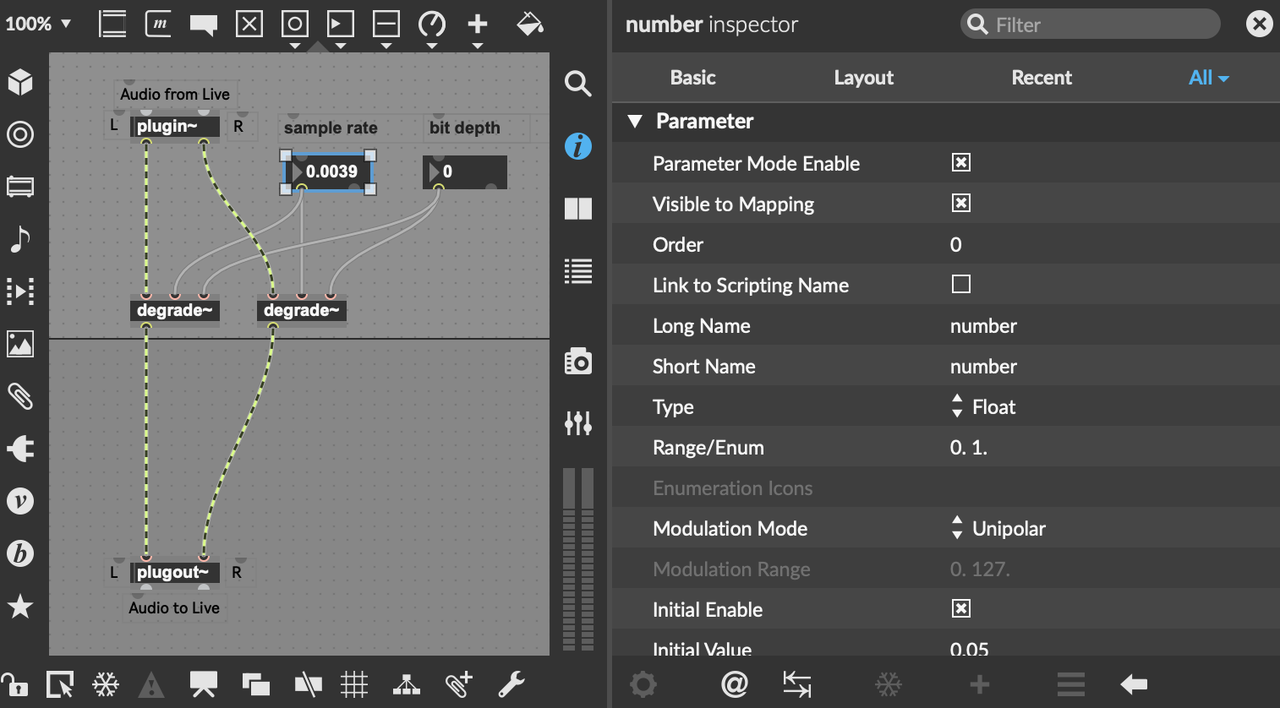
The number inspector in Max for Live.
The following adjustments need to be made:
Parameter Mode Enable: check
Name (long/short): foo
Type: match parameter
Range: match parameter
Modulation Mode: match parameter
Parameter Visibility: Automated and Stored
Track Automation
After making the Max for Live parameters ready for automation, the general automation mode needs to be enabled in the Arranger view (the tiny blue button above the audio track). Afterwards, each tack shows the available automation parameters and they can be edited.

Automation in the arranger window.
Clip Automation
The automation panel in the clip view gives access to all activated Max for Live parameters. This kind of modulation is tightly linked to the audio material, which can be both helpful and complicated.

Clip automation.
Find more information on live parameters: https://docs.cycling74.com/max5/vignettes/core/live_parameters.html
Exercise
Exercise I
Create a MIDI instrument and generate a sequence with parameter changes.
Exercise I
Realize a short acousmatic composition with Max for Live audio effects and automated parameters.