
Controlling a Servo with Arduino
Servo motors are digitally controlled actuators, which allow the precise setting of angles via pulse-width encoding. Servos used in RC models are low-cost and easy to program, which makes them attractive for prototyping in sound art and other DIY projects. The following example is a copy of the original example at Arduino.
Breadboard Wiring
Connecting the servo motor to the Arduino requires no additional parts, except for jumper cables. It is directly powered from the Arduino's 5V pin (larger servos may require an additional power source) and receives data from the Pulse-With-Modulation pin ~9:
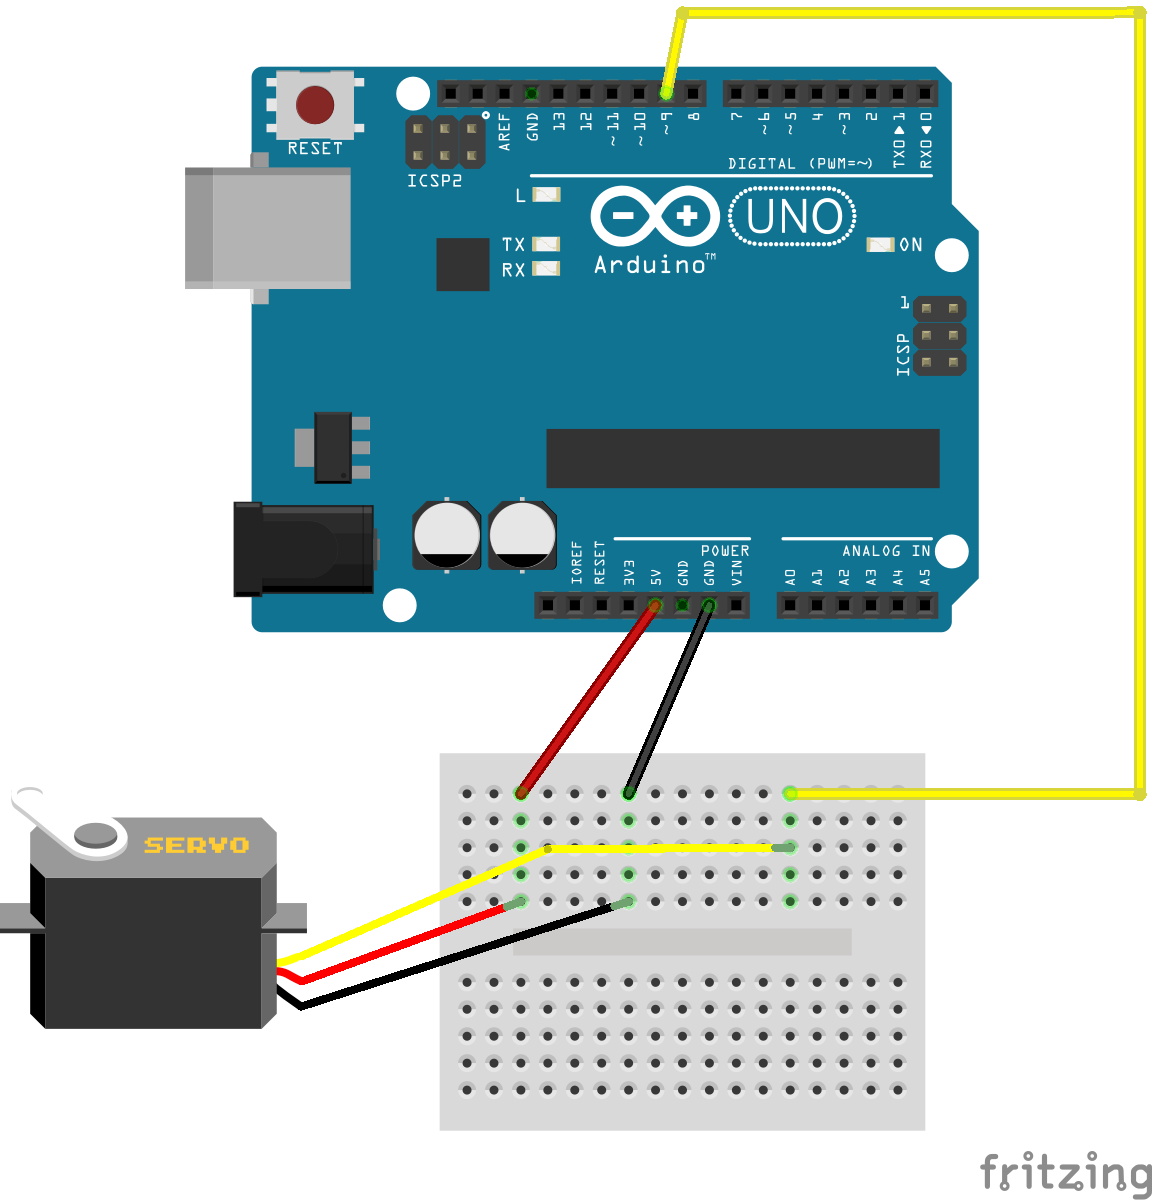
Arduino breadboard wiring for servo motor.
Arduino Code
The following code lets the sweep 180 degrees forward and backward, managed by two for loops (count up / count down) inside the main loop. Most consumer servos manage this range from 0 to 180 degrees and wrap exceeding values accordingly.