
Max: Controlling a Servo
Based on the Arduino-Servo-Example, Max can be used to send control data via USB.
Breadboard Wiring
Connecting the servo motor to the Arduino requires no additional parts, except for jumper cables. It is directly powered from the Arduino's 5V pin (larger servos may require an additional power source) and receives data from the Pulse-With-Modulation pin ~9:
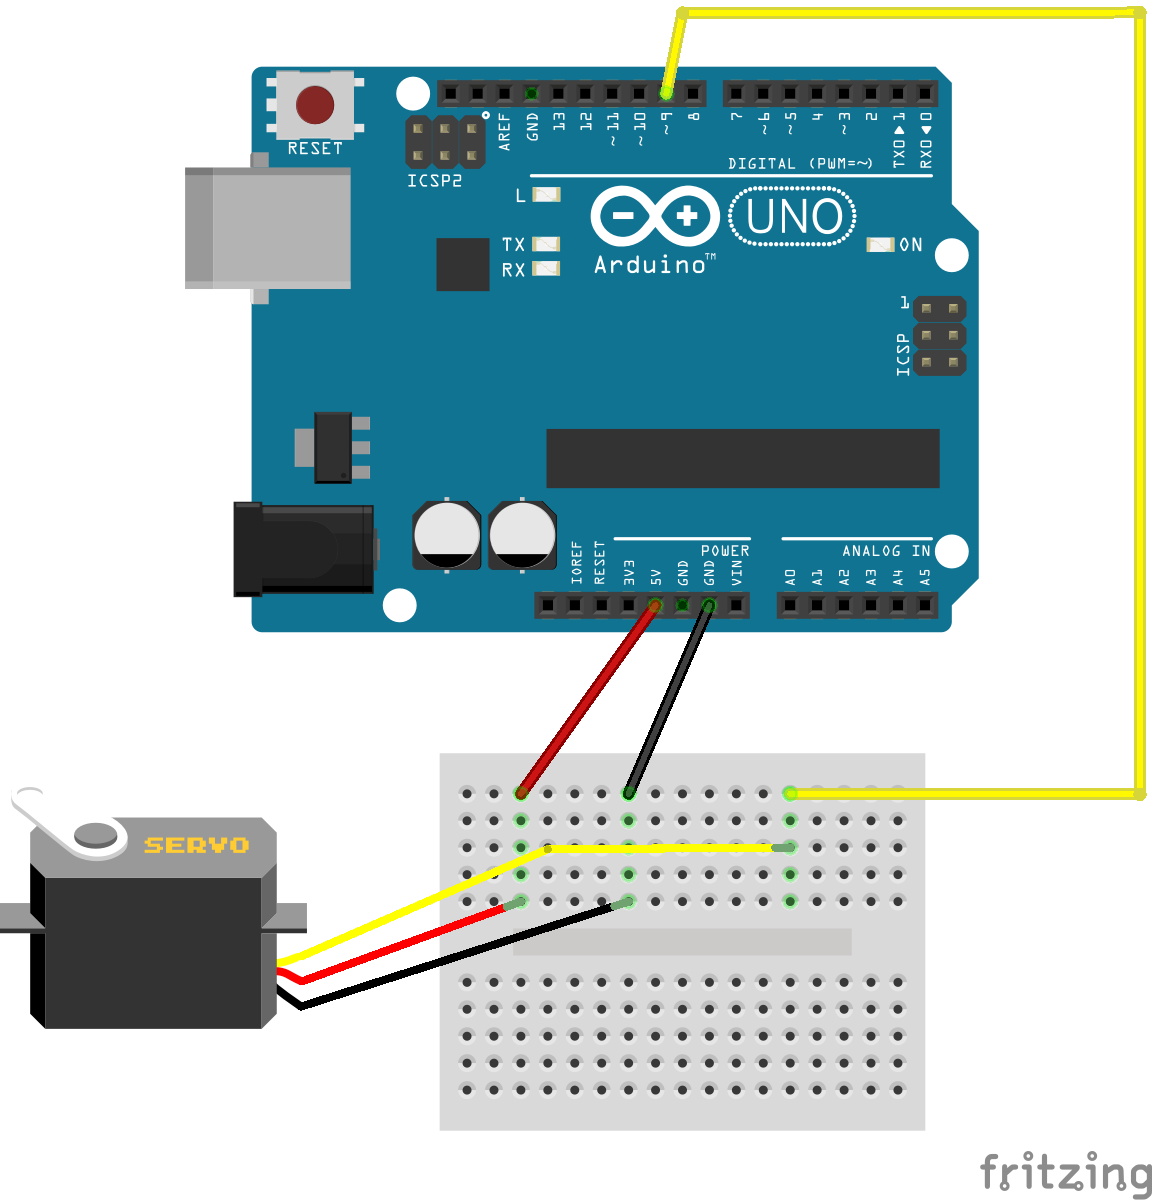
Arduino breadboard wiring for servo motor.
Max Patch
First, find the Arduino's serial port ID by clicking print and enter the result
into the serial object (in this case 'd' for 'usbmodem').
The rotary knob can be used to manually set the angle - it needs to be scaled from 0 to 180 before.
Finally, the metro can be started with the toggle. It sets random values at randomized time intervals.
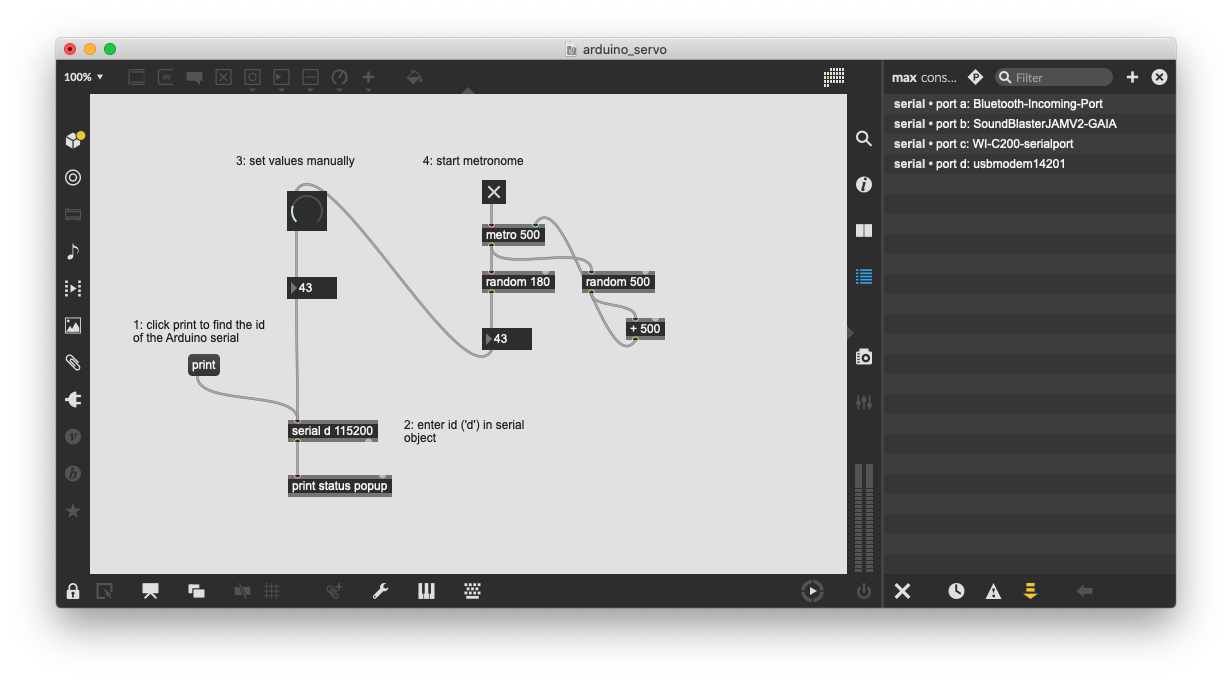
Max patch for controlling the servo motor.