
Physical Computing in Music and Sound Art
The term physical computing describes the use of micro-controller-based solutions for connecting software processes to the physical world. Sensors for obtaining physical quantities and actuators for manipulating objects open up manifold applications in sound art and music. Due to the rise of low cost, easy to program development boards like the Arduino, creative projects have easy access to these possibilities, giving rise to a variety of individual interfaces, controllers and installation concepts. Many projects presented at conferences like NIME are based on such solutions.
The Arduino is the most popular and established platform. It will be used in the examples and tutorials in this section. Other examples in the following sections are based on the Teensy Board or the ESP32 , which are programmed in the same way as the Arduino.
Sensor-Based Projects
BinBong
The first version of the BinBong (von Coler et al, 2017) is a haptic musical interface, using a MIDI over USB wired communication. A Teensy board is used to capture the force applied to four valve-like mechanics and the wooden top. The goal of this research-oriented instrument is to investigate the expressive means of force-based control in monophonic electronic musical instruments.
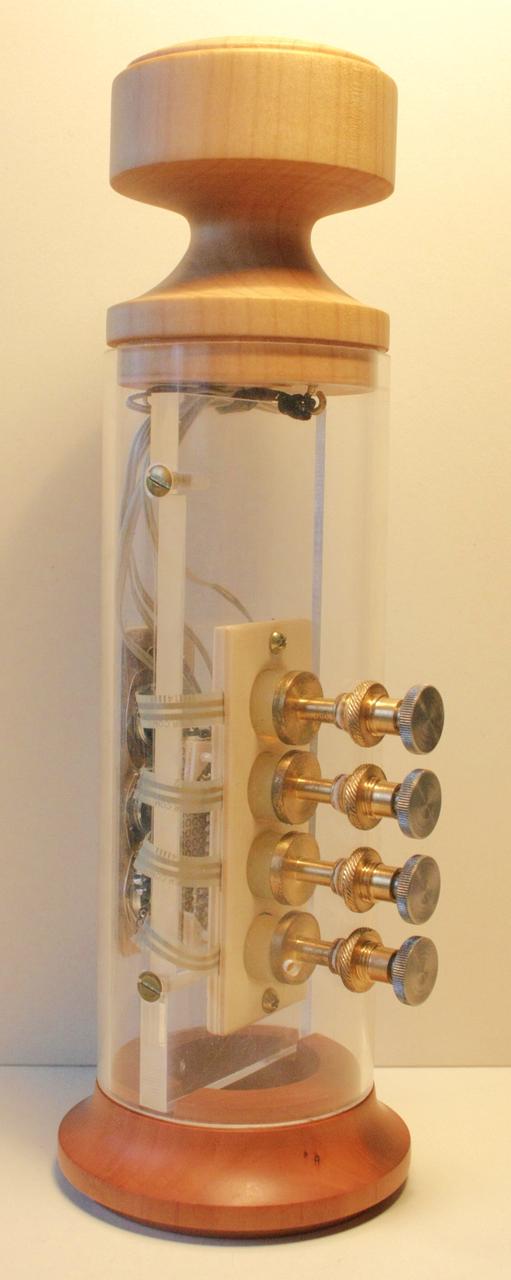
Front view of the BinBong with valve mechanics and wooden top.
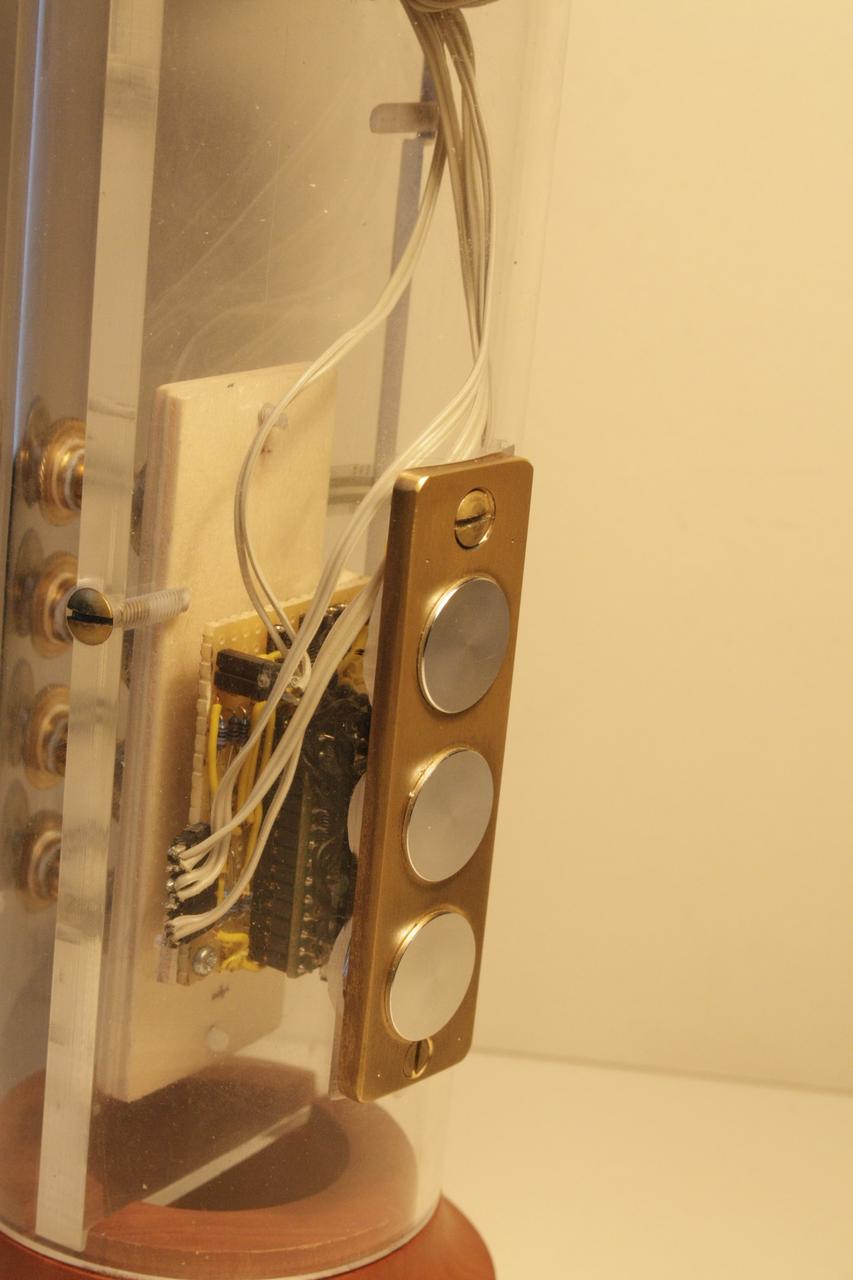
Rear view of the BinBong with Teensy and octave switches.
BinBong MKII
Based on the findings of the BinBong, a second, wireless version was designed, using a RedBear Duo board with integrated WiFi communication (Schmied, 2018). It has been designed to control spatial sound synthesis (von Coler et al., 2020) with an additional IMU and is used within user studies on mapping and expressivity (von Coler, 2021).
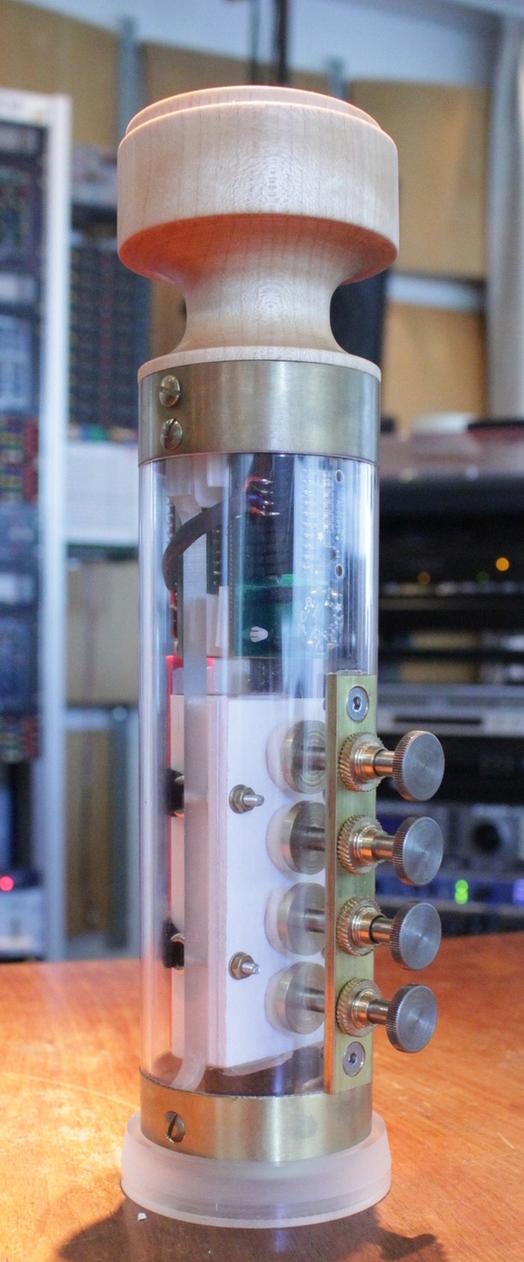
BinBong MKII.
GameTrak: The Gallows
The GameTrak is a motion controller for the Playstation, launched in 2004. Nowadays, it is obsolete as a gaming device and used devices are cheap. The actual control unit is basically a joystick with a string attached, allowing to measure displacement and lengthening via potentiometers:

The GameTrak is easily hacked in many ways and has thus been used in many experimental music projects and by laptop orchestras (Huberth & Nanou, 2016). It can be easily integrated into projects using PD, SC and other environments, while the potentiometers are very reliable. The follwing short demo video shows a small version of The Gallows with a simple PD sample synthesis patch:
Visit the Gallows Website for more information and audio recordings or get the code: https://github.com/anwaldt/The_Gallows
PS_Gloves
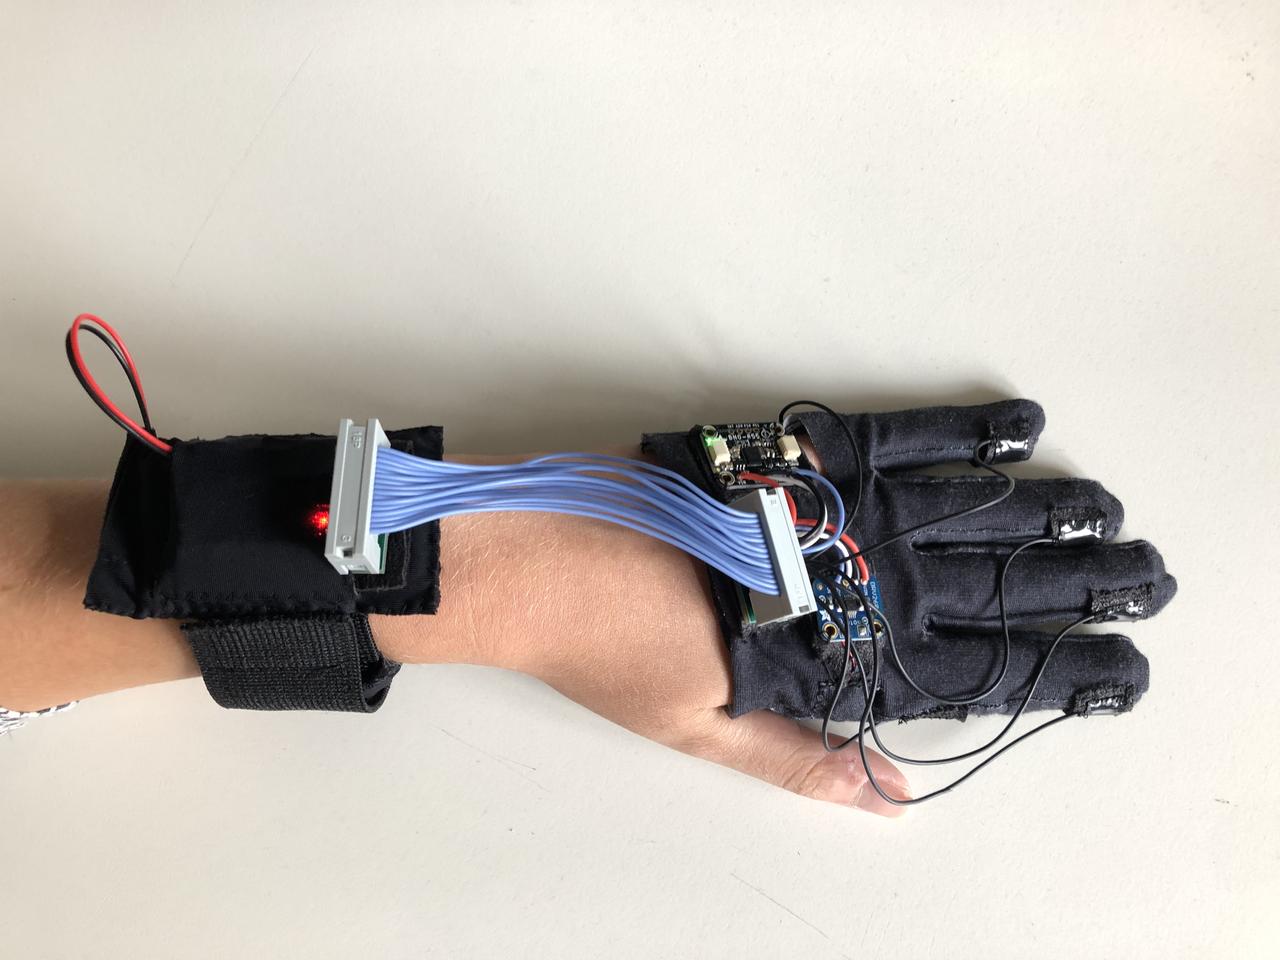
The PS_Gloves are a project by Paul Schuladen, developed between 2018 and 2023 and now being finalized in his master's thesis. They track posture and orientation of the hand, using two inertial measurement units (IMU) and various capacitive sensors at the finger tips. Within a final study, they are used to play physical models of string instruments.
Actuator-Based Projects
Cybernetic-playing Guitar
Building a self-playing and tuning guitar in a student project in a 2011 class with Douglas Repetto at TU Berlin. These videos show only the isolated attempts at plucking the strings with selenoids and tuning them with servo motors:
Ton-Technik & Pot-Shot
In his installations Ton-Technik and Pot-Shot, Andre Bartetzki uses solenoids to excite clay pots. An Arduino Mega is used in combination with SuperCollider to trigger the selenoids in specific patterns:
References
2021
- Henrik von Coler.
A System for Expressive Spectro-spatial Sound Synthesis.
PhD thesis, TU Berlin, 2021.
[details] [BibTeX▼]
2020
- Henrik von Coler, Steffen Lepa, and Stefan Weinzierl.
User-defined mappings for spatial sound synthesis.
In Proceedings of the International Conference on New Interfaces for Musical Expression (NIME). 2020.
[details] [BibTeX▼]
2018
- Anton Schmied.
Developement and stress testing of the BinBong MKII.
Master's thesis, TU Berlin, Berlin, Germany, 2018.
[details] [BibTeX▼]
2017
- Henrik von Coler, Gabriel Treindl, Hauke Egermann, and Stefan Weinzierl.
Development and evaluation of an interface with four-finger pitch selection.
In Proceedings of the 142nd Audio Engineering Society Convention. 2017.
[details] [BibTeX▼]
2016
- Madeline Huberth and Chryssie Nanou.
Notation for motion tracking controllers: a gametrak case study.
In Proceedings of the International Conference on New Interfaces for Musical Expression, 1. 2016.
[details] [BibTeX▼]
Pierre Schaeffer & Musique Concrète
Symphonie pour un homme seul
With Symphonie pour un homme seul (1949–1950), Pierre Schaeffer and Pierre Henry took the first approaches to Musique Concrète to a new level, beyond the scope of simple studies. Although not a multichannel composition, the artificial reverberation used in this piece can be considered a spatial audio production technique [1]:
Pupitre d'espace
The 'pupitre d'espace' was an electromagnetic interface for live diffusion of Musique Concrète.
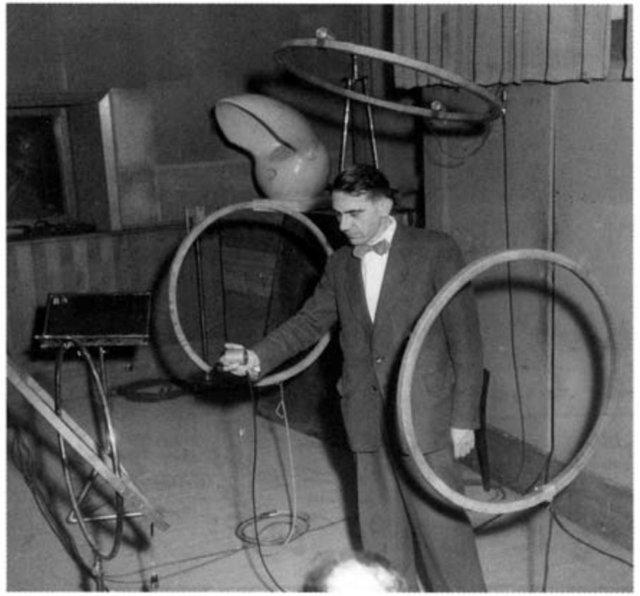
Pierre Schaeffer with the 'pupitre d'espace'.
References
2018
- Christoph von Blumröder.
Zur bedeutung der elektronik in karlheinz stockhausens œuvre / the significance of electronics in karlheinz stockhausen's work.
Archiv für Musikwissenschaft, 75(3):166–178, 2018.
[abstract▼] [details] [BibTeX▼]
2015
- Martha Brech and Henrik von Coler.
Aspects of space in Luigi Nono's Prometeo and the use of the Halaphon.
In Martha Brech and Ralph Paland, editors, Compositions for Audible Space, Music and Sound Culture, pages 193–204.
transctript, 2015.
[details] [BibTeX▼] - Michael Gurevich.
Interacting with Cage: realising classic electronic works with contemporary technologies.
Organised Sound, 20:290–299, 12 2015.
doi:10.1017/S1355771815000217.
[details] [BibTeX▼]
2011
- John Chowning.
Turenas: the realization of a dream.
In Proceedings of the 17th Journées d\rq Informatique Musicale. 2011.
[details] [BibTeX▼]
2010
- Peter Moormann.
Raum-musik als kontaktzone. stockhausens hymnen bei der weltausstellung in osaka 1970.
Paragrana, 19(2):33–43, 2010.
URL: https://doi.org/10.1524/para.2010.0023, doi:doi:10.1524/para.2010.0023.
[details] [BibTeX▼]
2008
- Marco Böhlandt.
“kontakte” – reflexionen naturwissenschaftlich-technischer innovationsprozesse in der frühen elektronischen musik karlheinz stockhausens (1952–1960).
Berichte zur Wissenschaftsgeschichte, 31(3):226–248, 2008.
[details] [BibTeX▼] - Jonas Braasch, Nils Peters, and Daniel Valente.
A loudspeaker-based projection technique for spatial music applications using virtual microphone control.
Computer Music Journal, 32:55–71, 09 2008.
[details] [BibTeX▼]
Binaural Spatialization with SC-HOA
The SC-HOA library by Florian Grond is a feature-rich toolbox for working with Ambisonics and binaural synthesis in SuperCollider. Once installed, it is well documented inside the SC help files. Additional information and install instructions are part of the Git repository. This section gives a brief introduction into the solution used for the SPRAWL server.
Installing SC-HOA
The SC-HOA library is shipped as a so called Quark and it can be installed from inside SC. Besides a GUI-based way, a single command is enough to install the complete library with all objects and classes in the system's directories:
Make sure to reboot the interpreter after installing the Quark. The external classes need to be compiled.
To find out where SC has installed your external, run:
Network Audio
OSI Model
The OSI Model groups different services, functions and applications of telecommunication systems into seven hierarchically arranged layers:
Layer |
Name |
Description |
|---|---|---|
7 |
Application Layer |
End user layer, HCI layer |
6 |
Presentation Layer |
data conversion, syntax |
5 |
Session Layer |
connection management, sockets |
4 |
Transport Layer |
end-to-end connections (TCP, UDP) |
3 |
Network Layer |
packet routing |
2 |
Data Link Layer |
data formats (bits to frames, MAC addresses) |
1 |
Physical layer |
bit stream transmission over medium/hardware (Ethernet, WiFi, ...) |
Network based audio systems can be based on different layers. This affects their capabilities and application areas. A comprehensive list can be found here: comparison on Wikipedia
Layer 1 Solutions
Layer 1 solutions only rely on the hardware used in telecommunication systems and use their own routing mechanisms. As a consequence, they usually need specific routers and are often used for direct peer-to-peer connections. The most widespread solution is the open AES50 format, which is found in devices by Behringer and Midas.
Layer 2 Solutions
Layer 2 solutions use the standard Ethernet protocol for transmitting data. Standard routers and hardware can thus be used for routing. Among the well known formats are AVB and AES51, as well as several proprietary solutions.
Layer 3 Solutions
Layer 3 solutions feature an IP header in their packages. Example solutions are DANTE, AES67, RAVENNA and AVB.
Layer 4 Solutions
Some solutions are based on Layer 4 protocols like TCP or UDP [1]. Since UDP is faster due to the missing handshake and error-correction. Although this makes it prone to package loss, it is the preferred method for achieving acceptable latency at the cost of dropouts, depending on the quality of the connection.
Examples for Layer 4 solutions can be found in the free and open software community, including NetJack2 [2], Zita-njbridge [3] and JackTrip.
Working with the Terminal
People developing on MAC or Linux systems are used to doing things from the terminal or console. Especially when working on remote servers - but also for embedded devices for audio processing - the terminal is the standard tool.
Directories
You can maneuver through the system's directories using
the cd command. Changing to an absolute path /foo/bar
can be done like this:
New directories are created with the mkdir command.
For creating a new directory mydir in your recent location,
type:
The content of the recent directory can be listed with the ls
command. The following arguments improve the results:
Create and Edit Files
A file can be created by touching it:
The default editor on most systems is nano. It is a minimal terminal based tool and does not
require X forwarding. To edit an existing file or create a new file, type:
Terminal Only
Inside nano, you have a lot of defined keystrokes for editing, file handling and other tasks. See the nano cheat sheet for a full list: https://www.nano-editor.org/dist/latest/cheatsheet.html
GUI Based
When working with X forwarding, simple text editors with GUI features can be used.
On the SPRAWL server, this includes mouspad or the minimal Python IDE idle.
Starting Applications
System wide binaries must be located in a directory that is listed in $PATH (see the final section on this page for details). They can be started by simply typing the name:
A local binary named foo can be started with the following command:
You can terminate your command with an ampersand (&) to run a process in the background. You can continue to work in the terminal, afterwards:
If you start a command this way, it gives you an id of the background process in brackets and the actual process ID (PID).
You can get the process back into foreground with the fg command followed by the background process id:
Check for Running Applications
At some point, users may want to know whether a process is running
or which processes have been started.
The command top lets you monitor the system processes with additional
information on CPU and memory usage, updated with a fixed interval:
htop is a slightly polished version, using colored results:
You can get a list of all running processes, including auxiliary ones, by typing:
Usually, these are way to many results.
If you want to check whether an instance of a specific
program is running, you can use grep after the ps aux
to filter the results:
Shell Variables
Sometimes it is convenient to store information in variables for later use. Some common variables that are used in Unix like operating systems like Linux, BSD or MacOS are for example PATH and DISPLAY.
Shell variables are usually uppercase. To get the content of a variable it is prefixed by a dollar sign. The command echo is used to print the content:
$ echo $PATH
/home/username/.local/bin:/home/username/bin:/usr/bin:/bin:/usr/local/sbin:/usr/sbin
$ echo $DISPLAY
:0
Defining a variable is done with an equal sign. It happens quite often that the program that should use the variable, opens another environment. To access the variable in that sub-environment, it has to be exported before:
Concept
This module focuses on fundamental principles of sound synthesis algorithms in C++, covering paradigms like subtractive synthesis, additive synthesis, physical modeling, distortion methods and processed recording. Theory and background of these approaches are covered in the contents of the Sound Synthesis Introduction.
The concept is based on Linux audio systems as development and runtime systems (von Coler & Runge, 2017). Using Raspberry PIs, classes can be supplied with an ultra low cost computer pool, resolving any compatibility issues of individual systems. Besides, the single board computers can be integrated into embedded projects for actual hardware instruments. Participants can also install Linux systems on their own hardware for increased performance.
Only few software libraries are part of the system used in this class, taking care of audio input and output, communication (OSC, MIDI), configuration and audio file processing. This minimal required framework allows the focus on the actual implementation of the algorithms on a sample-by-sample level, not relying on extensive higher level abstractions.
Although the concept of this class has advantages, there are different alternatives with their own benefits. There is a variety of frameworks to consider for implementing sound synthesis paradigms and building digital musical instruments with C/C++. The JUCE framework allows the compilation of 'desktop and mobile applications, including VST, VST3, AU, AUv3, RTAS and AAX audio plug-ins'. It comes with many helpful features and can be used to create DAW-ready software components. Environments like Puredata or SuperCollider come with APIs for programming user extensions. The resulting software components can be integrated into existing projects, easily.
References
2017
- Henrik von Coler and David Runge.
Teaching Sound Synthesis in C/C++ on the Raspberry Pi.
In Proceedings of the Linux Audio Conference. 2017.
[details] [BibTeX▼]
The JACK API
All examples in this class are implemented as JACK clients. Audio input and output is thus based on the JACK Audio API. The JACK framework takes over a lot of management and allows a quick entry point for programmers. Professional Linux audio systems are usually based on JACK servers, allowing the flexible connection of different software components. Read more in the JACK Section of the Computer Music Basics.
The ThroughExample
The ThroughExample is a slightly adapted version of the Simple Client. It wraps the same functionality into a C++ class, adding multi-channel capabilities.
Main
The file main.cpp creates an instance of the ThroughExample class. No command line arguments are passed and the object is created without any arguments:
Member Variables
The pointer to a jack client is needed for connecting this piece of software to the JACK server.
The MIDI Protocol
The MIDI protocol was released in 1982 as a means for connecting electronic musical instruments. First synths to feature the new technology were the Prophet-600 and the Jupiter-6. Although limited in resolution from a recent point of view, it is still a standard for conventional applications - yet to be replaced by the newly released MIDI 2.0. Besides rare mismatches and some limitations, MIDI devices can be connected without complications. Physically, MIDI has been introduced with the still widespread 5-pin connector, shown below. In recent devices, MIDI is usually transmitted via USB.
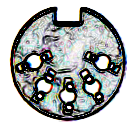
MIDI jack (5-pin DIN).
Standard MIDI Messages
MIDI transmits binary coded messages with a speed of $31250\ \mathrm{kbit/s}$. Timing and latency are thus not a problem when working with MIDI. However, the resolution of control values can be a limiting factor. Standard MIDI messages consist of three Bytes, namely one status Byte (first bit green) and two data bytes (first bit red). The first bit declares the Byte either a status Byte (1) or a data Byte (0).

Standard MIDI message with three Bytes.
Some of the most common messages are listed in the table below. Since one bit is used as the status/data identifier, 7 bits are left for encoding. This results in the typical MIDI resolution of \(2^7 = 128\) values for pitch, velocity or control changes.
Voice Message           Status Byte      Data Byte1          Data Byte2
-------------           -----------   -----------------   -----------------
Note off                      8x      Key number          Note Off velocity
Note on                       9x      Key number          Note on velocity
Polyphonic Key Pressure       Ax      Key number          Amount of pressure
Control Change                Bx      Controller number   Controller value
Program Change                Cx      Program number      None
Channel Pressure              Dx      Pressure value      None
Pitch Bend                    Ex      MSB                 LSB
Pitch Bend
If you are stuck with MIDI for some reason but need a higher resolution, the Pitch Bend parameter can help. Each MIDI channel has one Pitch Bend, each with two combined data Bytes, resulting in a resolution of \(128^2 = 16384\) steps.
System Exclusive
SysEx messages can be freely defined by manufacturers. They are often used for dumping or loading settings and presets, but can also be used for arbitrary control purposes. SysEx messages can have any length and are not standardized.
MIDI Note to Hertz
When working with MIDI, a conversion from MIDI pitch to Hertz is often necessary. There are two simple formulas for doing that. They both refer to the MIDI pitch of 69, wich corresponds to a frequency of 440 Hz:
\begin{equation*}
f[\mathrm{Hz}] = 2 \frac{\mathrm{MIDI}-69}{12} 440
\end{equation*}
\begin{equation*}
\mathrm{MIDI} = 69 +12 \log_2 \left( \frac{f}{440 \mathrm{Hz}} \right)
\end{equation*}
Getting Started with SuperCollider
Supercollider (SC) is a server-client-based tool for sound synthesis and composition. SC was started by James McCartney in 1996 and is free software since 2002. It can be used on Mac, Linux and Windows systems and comes with a large collection of community-developed extensions. The client-server principle aims at live coding and makes it a powerful tool for distributed and embedded systems, allowing the full remote control of synthesis processes.
There are many ways of approaching SuperCollider, depending on the intended use case. Some tutorials focus on sequencing, others on live coding or sound design. This introduction aims at programming remotely controlled synthesis and processing servers, which involves signal routing and OSC capabilities.
Getting SC
Binaries, source code and build or installation instructions can be found at the SC GitHub site. If possible, it is recommended to build the latest version from the repository:
https://supercollider.github.io/downloads
SuperCollider comes with a large bundle of help files and code examples but first steps are usually not easy. There are a lot of very helpful additional resources, providing step by step introductions.
Code snippets in this example are taken from the accompanying repository: SC Example. You can simple copy and paste them into your editor.
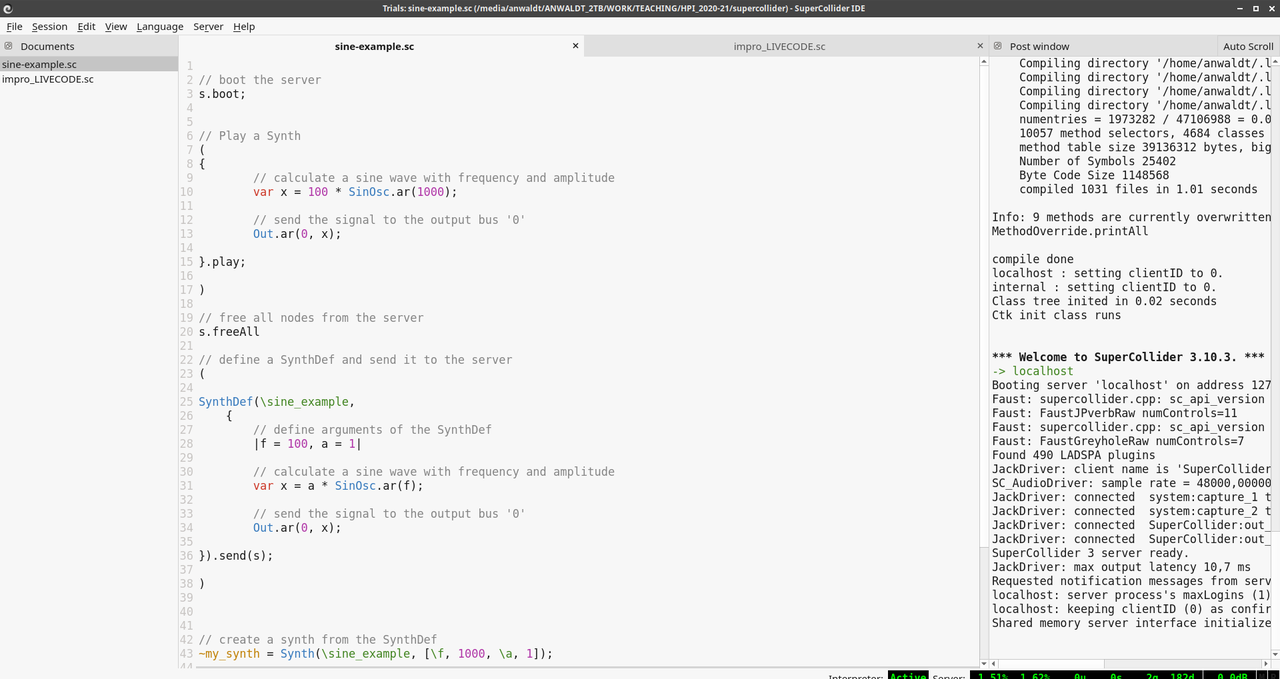
SC Trinity
SuperCollider is based on a client-server paradigm. The server is running the actual audio processing, whereas clients are used to control the server processes via OSC messages. Multiple clients can connect to a running server. The dedicated ScIDE allows convenient features for live coding and project management:

Server, client and ScIDE.
sclang
sclang is the SuperCollider language.
It represents the client side when working with
SC. It can for example be started in a terminal by running:
Just as with other interpreted languages, such as
Python, the terminal will then change into sclang mode.
At this point, the class library is complied,
making all SC classes executable.
Afterwards, SC commands can be entered:
ScIDE
Working with SC in the terminal is rather inconvenient.
The SuperCollider IDE (ScIDE) is the environment for
live coding in sclang, allowing the control of the
SuperCollider language:
ScIDE
When booting the ScIDE, it automatically launches sclang and is then ready to interpret. Files opened in the IDE can be executed as a whole. Moreover, single blocks, respectively single lines can be evaluated, which is especially handy in live coding, when exploring possibilities or prototyping. In addition, the IDE features tools for monitoring various server properties.
Some Language Details
Parentheses
Parentheses can help structuring SC code for live programming.
Placing the cursor inside a region between parentheses and
pressing Control + Enter evaluates the code inside the parentheses.
This way of coding is not suited for scripts which are executed as one.
Variable Names
Global variables are either single letters - s is preserved for the
default server - or start with a tilde: ~varname). They can be declared
and used anywhere in a language instance.
The first letter of tilde variables must be lowercase.
Local variables, used in functions or code blocks, need to be defined explicitly:
// single-letter-global variable:
x = 1.0;

// tilde-global variables:
~aValue = 1.1;

// local variable:
var foo;
Declare First
All declarations of local variables must happen in the beginning of a function or block. The following example throws an error:
Evaluating Selections
Some of the examples in the SC section of this class are in the repository, whereas other only exist as snippets on these pages. In general, all these examples can be explored by copy-pasting the code blocks from the pages into the ScIDE. They can then be evaluated in blocks or line-wise but can not be executed as complete files. This is caused by the problem of synchronous vs asynchronous processes, which is explained later: Synchronous vs Asynchronous
These features help to run code in the ScIDE subsequently:
Individual sections of code can be evaluated by selecting them and pressing
Control + Enter.Single lines of code can be evaluated by placing the cursor and pressing
Shift + Enter
Functions
Functions in SC are defined inside curly brackets.
Arguments can are declared in the very beginning.
Once created, a function is used by calling the .value() method:
Arguments can also be defined inside pipes: